...
...
| Warning |
|---|
!!! We are currently migrating this Cloud Instance to our own hosted Server instance !!!Please follow this link to get to the content you wanted: https://wiki.resolution.de/x/BYGwBThanks for your understanding. |
...
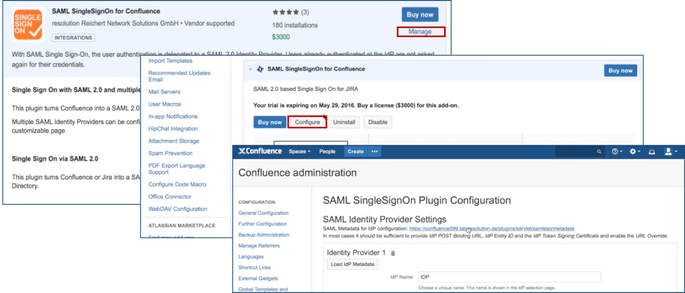
After installation succeeded, click on Manage, then choose Configure. Now, you are on the plugin configuration page.

...
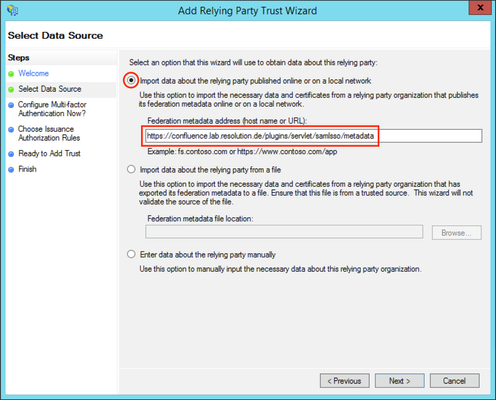
Substep A: Copy/Download the SAML Metadata URL
| Expand | ||
|---|---|---|
| ||
Substep A1:
|

| Expand | ||
|---|---|---|
| ||
Substep A2:
|
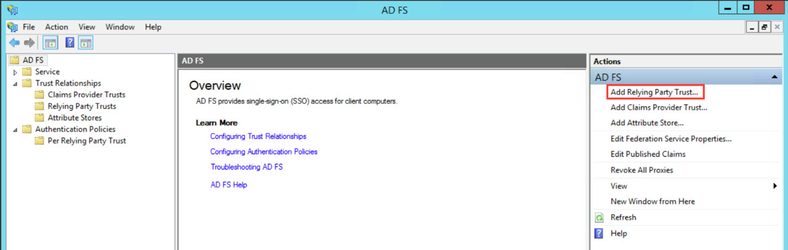
 Substep B: Start the Add Relying Party Trust Wizard
The rest of Step 2 will be completed in AD FS.
- Open the AD FS 2.0 Management Console and select Add Relying Party Trust to start the Add Relying Party Trust Wizard.
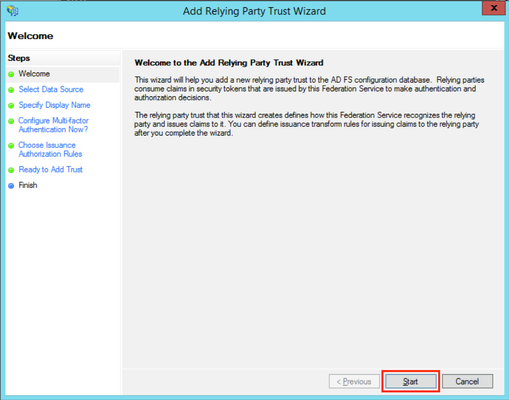
- Click the Start Button to start the wizard.

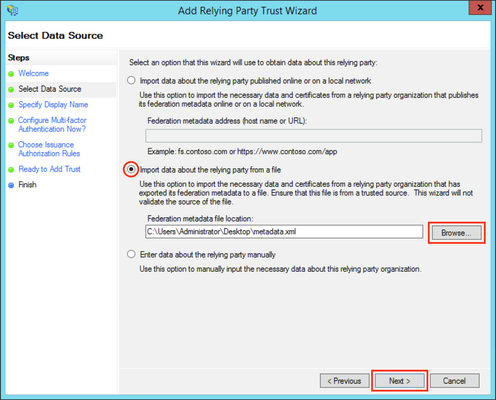
Substep C: Insert your SAML Metadata
...
| title | Do Substep C1 if you completed Step A1. |
|---|
Substep C1:
...
| Info |
|---|
| If an error is appeared after clicking on Next button, check the connection from ADFS to the JIRA instance. If you can't build up a connection, start a new wizard and begin with Step A2. |
| Expand | ||
|---|---|---|
| ||
Substep C2:
|
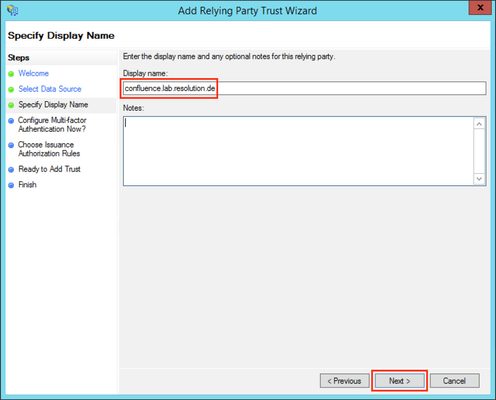
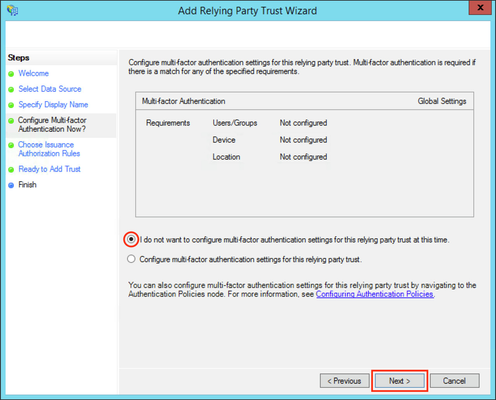
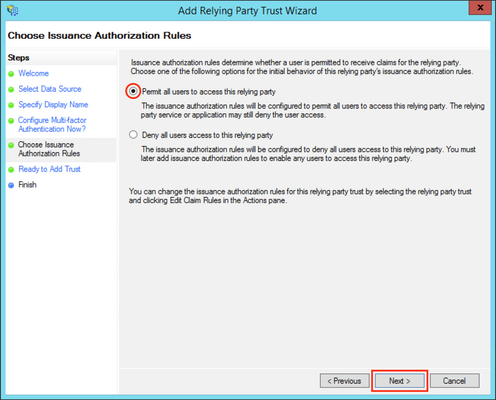
Substep D: Finish the Add Relying Party Trust Wizard
- Fill the field Display name with a name of your choice.
- Click Next.
- Select I do not want to configure multi-factor authentication settings for this relying party trust at this time.
- Click Next.
- Select Permit all users to access this relying party.
- Click Next.
- Click Next.
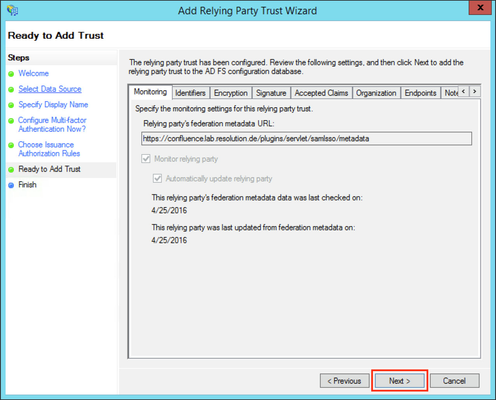
| Info |
|---|
| If an error is appeared after clicking on Next button, check if you have added the same relying party already. |
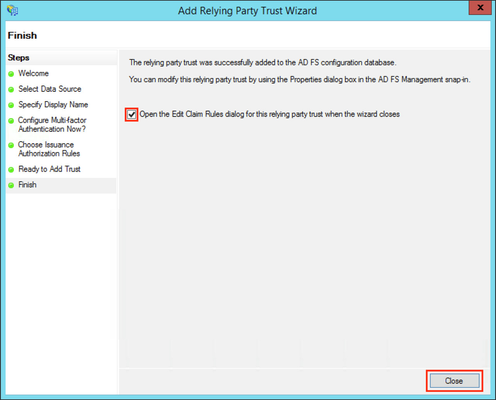
- Check the Open the Edit Claim Rules dialog for this relying party trust then the wizard closes checkbox to open the Edit Claim Rules dialog after closing the wizard.
- Click Close to finish the Add Relying Party Trust Wizard.

Substep E: Add Name ID as Claim Rule
JIRA needs a Name ID (on the normal case) from the SAML Response to authenticate users. So we need to add a claim rule on ADFS, which add the Name ID in every SAML Response from ADFS.
| Expand | ||
|---|---|---|
| ||
|
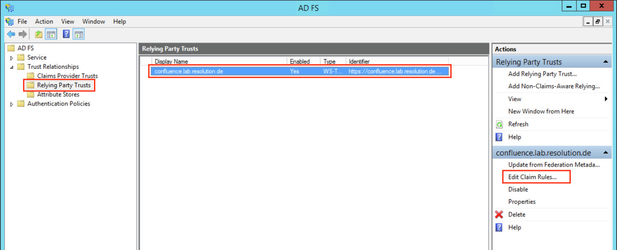
Otherwise, continue from here.
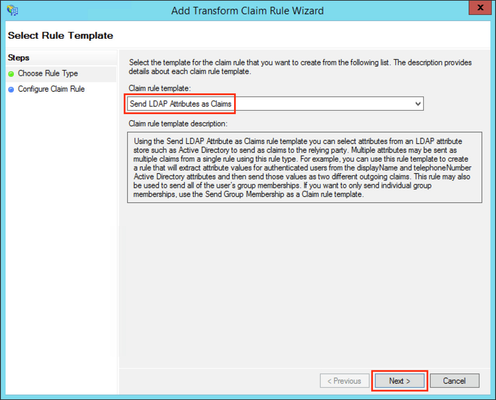
- Click the Add Rule... Button to open the Add Transform Claim Rule Wizard.
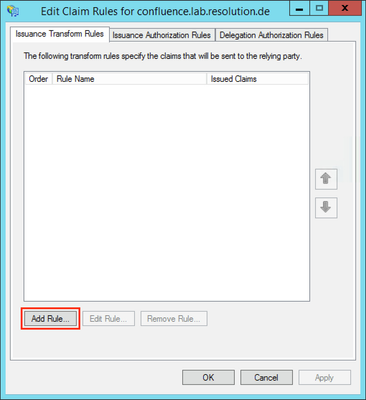
- Select Send LDAP Attributes as Claims in the Claim rule template drop-down list.
- Click Next.
...
...
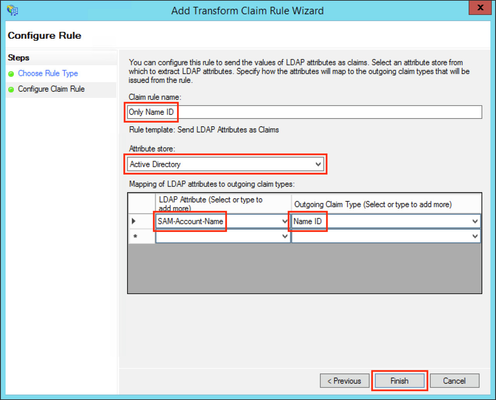
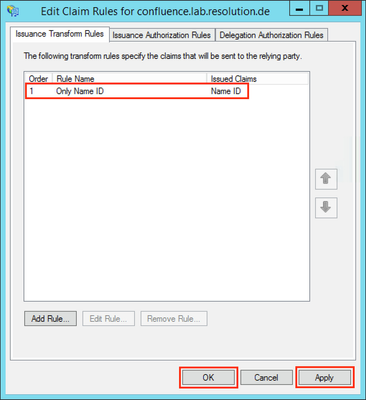
- Check if your new rule has been added to the Edit Claim Rules dialog. Try again Step E if it has failed.
- Click Apply to save your settings.
- Click OK to finish.
...

Step 3 will be completed in the plugin configuration page opened in Step1.
Substep A: Load ADFS Metadata
The recommended way to setup the ADFS is to import ADFS Metadata. The Metadata URL from ADFS is https://<your-adfs>/federationmetadata/2007-06/federationmetadata.xml.
- Click the URL radio-button and paste the Metadata URL into the field below.
- Check Accept all if your IdP's https-certificate is not in your Confluence instance's trust store.
- Click on Load.

Substep B: Configure general Confluence groups in Advanced IdP Settings
If a user logs in using SAML, he will be added to the groups specified in the User Groups section. This applies to all users. The user is assigned to these groups in addition to the groups in the SAML-response's attribute. The standard group in Confluence is called "confluence-users".
- Click on Show Advanced IdP Settings, find User Groups in the drop down menu.

- Click Save settings to store the configuration

...
In a separate browser, open the URL https://<your-confluence>/plugins/servlet/samlsso.
You should be authenticated by your ADFS and redirected to the JIRA Dashboard.
...
After testing, you can enable the login page redirection to finally activate the plugin. After checking the Enable SSO Redirect checkbox, click Save settings, now requests to the Confluence login page should be redirected to the ADFS.

...