Setup SAML SSO with ADFS (Confluence) - 0.14.X - 0.14.4
!!! We are currently migrating this Cloud Instance to our own hosted Server instance !!!
Please follow this link to get to the content you wanted: https://wiki.resolution.de/x/F4GIAg
Thanks for your understanding.
This guide describes how to complete the initial setup for SAML Single Sign On (SSO) for Confluence with ADFS, applicable till plugin version 0.14.4. If you need any further support please feel free to contact us here.
Step1 Install the plugin | Step2 Setup the ADFS (A-E) | Step3 Configure the Plugin (A-B) | Step4 Test | Step5 Enable login redirection |
|---|
The video below is an example installation guide for setting up SAML SSO for Confluence (URL: https://youtu.be/HB5blJt9VTE).
Prerequisites
- ADFS 2.0/2.1/3.0
- Confluence must be accessible via HTTPS. See https://confluence.atlassian.com/display/DOC/Running+Confluence+Over+SSL+or+HTTPS for instructions.
This is necessary because ADFS accepts only HTTPS-URLs for SAML endpoints.
Step 1: Install the plugin
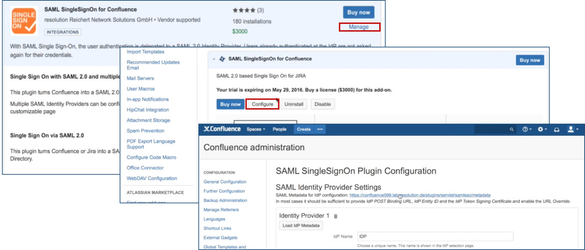
Click Add-ons under Confluence Administration on the top right corner of your Confluence interface. Then, choose Find new add-ons and you will be taken to Atlassian Marketplace. Search for SAML SSO and click on Free Trial to install.

After installation succeeded, click on Manage, then choose Configure. Now, you are on the plugin configuration page.
Step 2: Setup the ADFS
Substep A: Copy/Download the SAML Metadata URL
Substep A1:
- Copy the SAML Metadata-URL from your SAML Single Sign On config page.
